Year Foundation Week 5 Visual Art Activity
Parents just a quick message to advise that this activity will require parental supervision and assistance. Also, please only use the resources that you may already have at home.
Learning Intention: For children to engage in conversation, expand their vocabulary, make individual choices, and practice fine motor skills as they learn through cooking and discovering, the scientific elements of bread rising.
Success Criteria: When children can talk about the process of bread making, the ingredients used and how bread rises?
Talking Point: Have a discussion and go deeper with your child explaining how the yeast in the mixture helps your bread to rise and why this is happening. This will assist your child to have some understanding of the scientific component behind bread making. Learning while having fun!
We are learning and playing with simple kitchen science experiments. Why kitchen science? because everything you need is already in your kitchen cupboards. There are so many cool experiments you can do at home with everyday household items. This experiment is sure to develop a love for not only being creative in art, but also learning through science. Have lots of fun kids and please remember to film, share and upload your work via Seesaw, email and/or google doc.
REMEMBER GET CREATING!
How to make quick simple Bread with your kids
Ingredients:
- 3 cups all-purpose flour (separated into 1 cup and 2 cups)
- 1/4 cup sugar
- 1 packet yeast (or 2 1/4 teaspoon)
- 1 cup warm water
- 1/4 cup butter, melted
- 1 teaspoon salt
Instructions:
- Combine 1 cup of the flour plus all the sugar and yeast in a bowl.
- Add warm water. (It should be about the temperature of your bath water.)
- Set on a warm counter for 10 minutes.
- When the yeast mixture looks puffy, add 1 cup of flour plus the teaspoon of salt and melted butter. Stir.
- Add last cup of flour and stir again.
- Your dough will be VERY STICKY. Pour 1/4 cup of extra flour on a cutting board or clean countertop then put the dough on top.
- Knead the dough with your hands 10 minutes. Press down with the heel of your hand, then fold the dough in half. Press down again, fold. Repeat.
8 .When the dough changes from sticky to silky, place it in a greased loaf pan.
9. Lay a clean towel over the loaf pan and set it in a warm spot. Allow the dough 45 minutes to rise.
10. unch it down and let it rise for 10 more minutes. While it’s rising again, preheat the oven to 375 degrees F.
11. Bake at 375 degrees F for 25 minutes.
12. Draw a picture of your beautiful smelling great tasting bread too!
Click the link below to view this really cool clip showing how to make a simple bread recipe!
http://www.viewpure.com/t6d_XXyrqBk?start=0&end=0
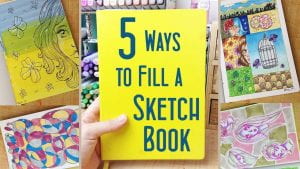
Hello everyone, just a reminder as with last term Mrs Velardi would like to introduce my infamous Sketchbook entries! Every week I will upload a video of a nature walk I have taken around our school. May I add that our school looks absolutely beautiful, you are sure to be surprised on your return! I will stop at a certain section, pause give commentary and ask you to add to your sketchbook from last term. I then ask that you share your entry with me via Seesaw, email or google doc.
Contact Details:
Teresa Velardi (Art Teacher)
tvelardi@stgeorgepreca.catholic.edu.au
PLEASE REMEMBER TO SHARE!


