Year 6 Week 4 Visual Art Activity
Parents, just a quick message to let you know that this activity will require parental supervision. Also, please only use resources that you may already have at home.
Learning Intention: To create different mixtures using the same starting materials. To observe that some materials will dissolve in liquid to form a solution. To explain that some changes result in the formation of new materials and that this kind of change is not usually reversible.
Success Criteria: That students can explain the chemical reaction that occurs when the bath bomb interacts with the water.
We are learning and playing with simple kitchen science experiments. Why Kitchen science? Because everything you need is already in your kitchen cupboards. There are so many cool experiments to do at home with everyday household items. This experiment is sure to develop a love for not only being creative in art, but also learning through science. This is also an exciting science experiment that ends in a candy treat ENJOY! Have lots of fun kids and please remember to film, share and upload your work to me via email and/or google doc.
How to make homemade bath bombs
Ingredients
- 2 cups baking soda
- 1 cup citric acid
- 1/4 cup cornstarch
- 1/4 cup Epsom salt
- 1/4 cup coconut oil (or another skin-friendly oil of your choice)
- 10-15 drops essential oil (optional)
- Water-soluble colorants (optional)
- witch hazel (optional)
- bath bomb molds
- sprinkles or other fun additions (optional)
Instructions
-
First, assemble your ingredients!
-
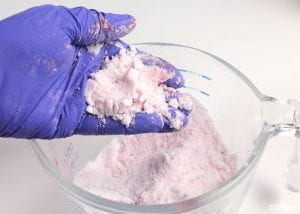
Mix together all of your “dry” ingredients–ie, the baking soda, citric acid, cornstarch, and Epsom salt–in a large bowl with a whisk.
-
Then move on to the “wet” ingredients in a separate bowl. You will first need to melt your coconut oil (place it in a microwave for about 30 seconds, checking on it, and then adding 5-10 more seconds until the oil is completely melted). Then, add in any essential oils (if using) to the melted coconut oil. You can also add your colorant into your wet ingredients at this stage if you are making single-colored bath bombs.
-
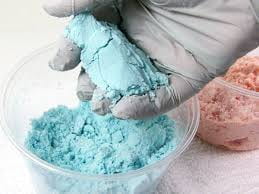
Now, working VERY slowly, pour your “wet” ingredients” into your “dry” ingredients and incorporate quickly with a whisk, your hands, a food processor, or a stand mixer. Only add in a small amount of the oil at a time to minimize the mix from reacting. You want to end up with a mixture that feels like “wet sand”. If your mixture is a bit on the dry side, spray a few times with witch hazel. You’ll know the mixture is just at the right moisture level when you can form a ball of it in your hands and drop it back into the bowl without crumbling. If your mix starts fizzing, you’ve gone too far!
-
If you are making multi-colored bath bombs, I suggest separating the wet sand mix into separate bowls and then adding in the different colors. Make sure to mix really well so that the colors are well-distributed.
-
Now for the fun part! Using your hands ( wear gloves to keep them nice and clean), press the bath bomb mixture into your bath bomb molds. If you are making multi-colored bombs, simply alternate the colors you add into the molds. If adding sprinkles, you can mix a dash into your bath bomb mixture, then pour a bit into the bottom of one of the mold halves before filling. If you want your bath bombs to float, DO NOT PACK TOO TIGHT. Just lightly press down the mix, overfilling each half slightly, then press the two halves together. You can either keep the bath bombs in the molds, or carefully remove them after allowing them to set for a few minutes. It helps if you first tap on the metal molds a few times with a metal spoon before removing.
-
Let the bath bombs dry, usually about 24-48 hours (depending on your humidity). To help loosen them, tap on them a bit with a metal spoon before removing.
-
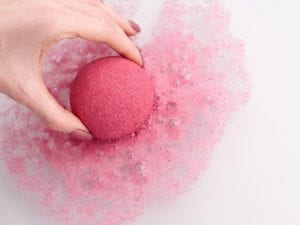
Add to water and enjoy!
Click the link below to view this really cool way of making a homemade bath bomb!
http://www.viewpure.com/4OSM7M0Zm48?start=0&end=0
Contact Details: Teresa Velardi (Art Teacher)
tvelardi@stgpreca.catholic.edu.au
